GNS3 Problems in Fedora 25
In my first blog post, I setup a Fedora 25 machine running Fedora Server version and GNS3 for network simulation. Unfortunately, during a “dnf update” on the system GNS3 stopped working. This was possibly an issue with the version of GNS3 I was running (1.5.3) and the aiohttp python library. I did see that GNS version 2.1 was supposed to fix the aiohttp library issue (this post), but it was only available on the Fedora 26 repositories. Upgrading from Fedora 25 to 26 is simple, as detailed by this Fedora Magaizne article. In short, all you need to do is run the following commands:
sudo dnf upgrade --refresh
sudo dnf install dnf-plugin-system-upgrade
sudo dnf system-upgrade download --releasever=26
sudo dnf system-upgrade reboot
It was quick and ran without any issues. After the reboot into Fedora 26, I was able to run dnf update and get GNS3 up to 2.1. GNS3 would actually load and let me create a project, so I thought my issues were gone. Unfortunately, when I tried to start an IOS router, I got a dynamips error: Dynamips hypervisor process has stopped, return code: -11. I found the same issue on a comment on the GNS3 Github page. The 64 bit version of dynamips appears to be having issues on Fedora 26, but the 32 bit version works. After getting a few dependency issues resolved, I was able to test and verify the workaround. This blog post is going to run through how to remove the dynamips version that comes with the copr repository and then build the 32 bit version from source.
Removing Dynamips
The official GNS3 documenation for installing on Fedora describes how to enable the copr repository to download dynamips and vpcs. This makes it really simple to remove the non-working version via dnf:
[otaku@netlab ~]$ sudo dnf remove dynamips

Once it completes, dynamips is removed from the system and you can now download the source and build the 32 bit version.
Pulling Down Dynamips Source Code
Because the source code is hosted on GitHub, you can easily pull down the source code. Simply use the “git clone” command (You can read my previous post for a Git intro) to pull down the source code:
[otaku@netlab ~]$ git clone git://github.com/GNS3/dynamips.git

Building The 32 Bit Version Of Dynamips
With the source code downloaded you are ready to build from scratch, but before you do you will need to download a few dependencies. Because you will be building the 32 bit version on a 64 bit system, the 32 bit libraries also need to be downloaded.
[otaku@netlab ~]$ sudo dnf install elfutils-libelf-devel libpcap-devel

Downloading the 32 bit versions of the libraries only require you to add .i686 at the end of the package name which specifies the 32 bit version.
[otaku@netlab ~]$ sudo dnf install glibc-devel.i686 elfutils-devel.i686 libpcap-devel.i686

Once all dependencies have been resolved, all you have to do is change into the dynamips directory that was downloaded when you cloned from GitHub, make a directory to hold the build code, and then build it.
[otaku@netlab ~]$ cd dynamips/
[otaku@netlab ~]$ mkdir build
[otaku@netlab ~]$ cd build
[otaku@netlab ~]$ cmake .. -DDYNAMIPS_ARCH=x86
Note that if you don’t have cmake, you can download and install it via the official repositories by using “sudo dnf install cmake”.

Text should begin to scroll through the terminal window. If successful, you should see the final output similar to this:

Once you build the source, you can use “make” to compile the code and “install” to install dynamips onto your system.
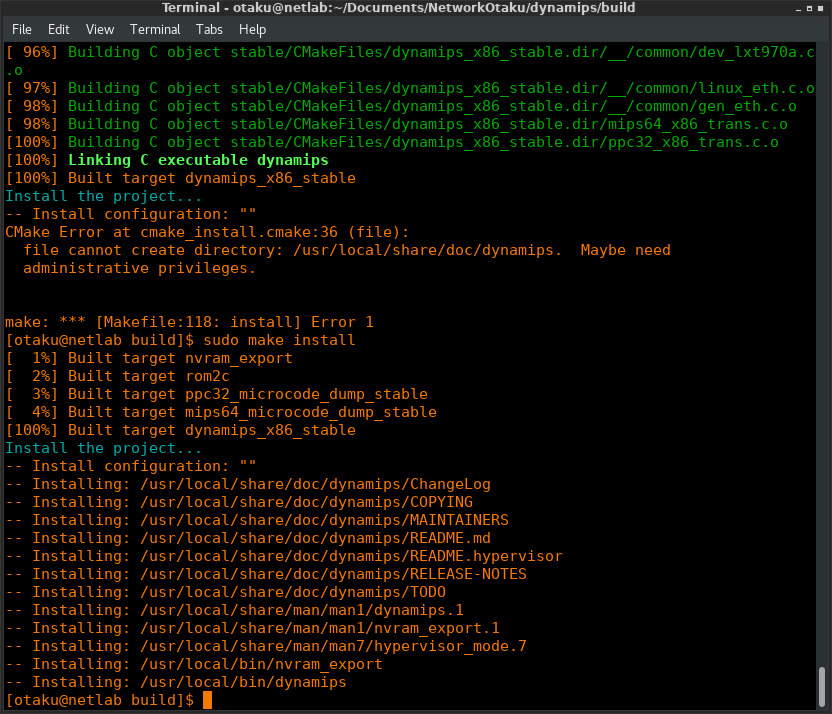
[otaku@netlab ~]$ sudo make install
You should see the compiling take place in the terminal, which will give a completion percentage at the beginning of each new line. As you can see below, the first time I ran this I did not use sudo, so it was able to compile the software but not install it. If this happens, just run “sudo make install” again, and the system will notice you already compiled and simply install the software.
Upon completion of installation, I was able to fire up GNS3 and start an IOS device without dynamips crashing.
Conclusion
Hopefully this helps anyone who was having the same dynamips crash error that I was receiving. When working with open source tools, don’t be afraid to get under the hood, report problems, and work with others in the community to either fix problems you are having or helping others with theirs.

This post helps me a lot. Very useful . Thanks again.
LikeLike
Thank you for your help !!
LikeLike
thanks after not sleeping for 5 days i finally got it to work on fedora 28
LikeLike